A properly installed roof is one of the most important investments homeowners can make to protect their property. It helps keep rainwater out, shields the home from changing weather conditions, and contributes to the overall appearance and value of the house. Among the many roofing options available, asphalt shingles remain a popular choice because of their versatility, attractive appearance, and availability in different colors and designs.
For homeowners in Arlington, VA, and the surrounding areas, understanding the installation process can make it easier to plan a roofing project and evaluate the work performed by a professional contractor. From inspecting the existing roof deck to installing shingles, flashing, and ridge caps, each stage plays an important role in the finished roofing system.
A successful asphalt shingle roof installation requires more than placing shingles across the roof. It involves careful preparation, appropriate material selection, proper underlayment, accurate fastening, and attention to details that help manage water and withstand local weather conditions.
Understanding Asphalt Shingle Roofing
Asphalt shingles are roofing materials manufactured with a base layer, asphalt, and protective mineral granules. The exact construction varies by product, but the combination is designed to provide weather resistance, durability, and a finished appearance suitable for many residential properties.
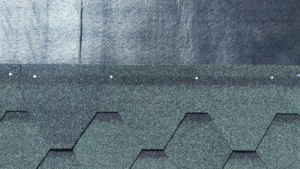
Asphalt shingles are available in several styles, including traditional three-tab shingles and architectural shingles. Architectural shingles generally have a more dimensional appearance and may offer different performance characteristics depending on the product selected.
Homeowners can also choose from a variety of colors, textures, and profiles to complement their property’s exterior.
One reason asphalt shingle roof installation is common in residential construction is the flexibility of the material. Asphalt shingles can suit many architectural styles, from traditional homes to newer suburban properties. They can also be coordinated with siding, trim, windows, and other exterior features.
However, the performance of an asphalt shingle roof depends on more than the shingles themselves. Underlayment, flashing, roof ventilation, edge protection, and the condition of the roof deck all contribute to the overall system.
Selecting quality materials and ensuring they are installed correctly helps homeowners get the most from their roofing investment.
Inspect the Existing Roof and Assess the Project
The first stage of a roof installation or replacement is evaluating the property’s existing roofing system. This assessment helps identify visible damage, determine the condition of the roof deck, and establish the scope of work.
For a replacement project, the contractor typically examines the existing shingles, flashing, roof edges, valleys, and areas around chimneys or vents. Signs of concern may include missing shingles, curling edges, exposed fasteners, damaged flashing, or evidence of previous leaks.
Inside the home, water stains on ceilings, damp attic insulation, and visible moisture around roof penetrations can indicate problems that deserve further investigation.
Evaluating the Roof Deck
The roof deck is the structural surface that supports the roofing materials. It is commonly made from plywood or oriented strand board, although the specific construction varies by property.
If the deck has been exposed to moisture, sections may become weakened, swollen, delaminated, or otherwise unsuitable for new roofing materials.
During asphalt shingle roof installation, damaged decking should be addressed before the new roofing system is completed. Installing shingles over a compromised surface may lead to fastening problems and reduce the reliability of the finished roof.
A contractor should explain how concealed damage will be handled if it is discovered after the old roofing material has been removed.
Measuring the Roof
Accurate measurements help determine the quantity of shingles, underlayment, flashing, ridge caps, and other materials needed for the project.
Roofing contractors generally calculate roof area while accounting for slopes, valleys, hips, ridges, and other design features. They also consider appropriate allowances for cutting and waste.
A detailed estimate should describe the materials and labor included in the project so homeowners can understand the proposed scope of work.
Choose the Right Asphalt Shingles
Selecting the appropriate shingles is an important decision because the material affects the roof’s appearance, expected service life, and maintenance requirements.
Homeowners in Arlington, VA, should consider architectural style, budget, weather exposure, manufacturer specifications, and any applicable community or homeowners association requirements.
Three-Tab Asphalt Shingles
Three-tab shingles have a relatively flat profile and a repeating pattern. They have traditionally been used on many residential roofs because of their straightforward appearance.
They may be suitable for homeowners seeking a simple roofing design, provided the product meets the property’s requirements and the homeowner’s expectations.
Availability, warranty terms, and performance characteristics vary by manufacturer and product line.
Architectural Asphalt Shingles
Architectural shingles have a layered or dimensional appearance that can add depth to the roof. They are often selected for their visual appeal and the range of product options available.
Some architectural shingles are designed to provide enhanced wind resistance or other performance features compared with certain basic products. However, the actual performance depends on the specific shingle, installation method, and roof conditions.
Homeowners should compare product specifications rather than assuming that all architectural shingles provide identical protection.
Selecting the Right Color
Shingle color can significantly influence the home’s curb appeal. Common choices include charcoal, black, gray, brown, and weathered wood tones.
When planning asphalt shingle roof installation, homeowners should compare sample colors with their siding, brickwork, exterior trim, and surrounding landscape.
The roof should complement the overall exterior rather than appear disconnected from the home’s existing design.
It is also helpful to review samples outdoors because natural light can make colors look different from how they appear in a showroom or online image.
Reviewing Product Warranties
Asphalt shingles may come with manufacturer warranties that cover specific defects under stated conditions. Coverage, exclusions, and duration vary by product.
Homeowners should review the actual warranty documents and understand any requirements involving approved installation methods, ventilation, maintenance, and compatible components.
A warranty should not be treated as a guarantee against every leak, storm event, or installation problem.
Prepare the Property and Work Area
Before installation begins, the contractor should plan how to protect the property and manage the work area.
Roof replacement can involve removing heavy materials, moving equipment, and transporting shingles to the roof. Appropriate preparation helps reduce disruption and protects landscaping and exterior features.
Homeowners should move vehicles away from the work area, secure fragile outdoor items, and discuss access arrangements with the contractor.
Protecting Landscaping and Exterior Features
Tarps and other suitable protective measures may be used to help protect plants, walkways, decks, and nearby surfaces from falling debris.
The contractor should also identify vulnerable features such as outdoor lighting, air-conditioning equipment, and decorative structures.
Homeowners should discuss how debris will be collected and how the property will be cleaned at the end of the project.
Planning Safety and Material Delivery
Roofing work involves working at heights, handling materials, and using specialized equipment. Professional crews should follow appropriate safety practices and use suitable fall-protection equipment.
Material delivery should also be coordinated to avoid unnecessary damage to driveways, walkways, and landscaping.
Good preparation helps the project proceed efficiently while reducing avoidable risks.
Remove the Existing Roofing Materials
For many roof replacement projects, the next stage is removing the existing shingles and related materials. This exposes the roof deck so the contractor can inspect its condition before installing the new system.
Although some roofing systems may permit an overlay under specific conditions, a complete tear-off often allows for a more thorough evaluation of the underlying surface. Whether an overlay is permitted or advisable depends on local code requirements, existing roof conditions, and manufacturer instructions.
Removing Old Shingles
The crew removes the existing shingles using appropriate tools and methods. Underlayment, damaged flashing, and other components may also need to be removed or replaced, depending on their condition and the project scope.
Old materials should be collected and disposed of properly.
Removing the existing roof can reveal issues that were not visible during the initial inspection. These may include damaged decking, deteriorated flashing, or signs of long-term moisture exposure.
Inspecting for Hidden Damage
After the old materials have been removed, the contractor should inspect the exposed roof deck.
Areas with rot, swelling, delamination, or weakened fastening surfaces may require repair. Any replacement decking should be installed securely and made suitable for the roofing system.
This step is essential because new shingles cannot correct structural or moisture-related problems hidden underneath them.
A reliable asphalt shingle roof installation begins with a sound surface rather than covering existing damage.
Repair and Prepare the Roof Deck
Once the existing roofing materials have been removed, the contractor prepares the roof deck for the new roofing system.
This work may include replacing damaged sections, securing loose decking, and checking that the surface meets the requirements of the selected roofing products.
The roof deck should provide a stable, appropriately prepared base for the underlayment and shingles.
Addressing Damaged Wood
Wood that has deteriorated because of prolonged moisture exposure may no longer hold roofing fasteners reliably. Simply covering such areas can leave the roof vulnerable to future problems.
The contractor should identify damaged sections and explain the necessary repairs. The extent of the work depends on the condition of the deck and the cause of the deterioration.
If moisture damage resulted from a previous leak, the source should also be corrected.
Preparing a Suitable Surface
The deck should be clean enough and sufficiently even for the planned roofing materials. Protruding fasteners, loose debris, and other obstructions may interfere with underlayment placement or shingle installation.
Roof decking must also meet applicable requirements for thickness, support, and fastening.
Proper preparation helps the new roofing system perform as intended and supports a cleaner installation.
Install Drip Edge and Other Required Edge Components
Roof edges are important areas to detail because rainwater must be directed away from the roof deck and into the drainage system.
Drip edge is a metal flashing component installed along designated roof edges. Its purpose is to help direct water away from vulnerable edges and protect the roof assembly.
The required installation sequence depends on the roof design, applicable building codes, and the manufacturer’s instructions.
Protecting the Eaves and Rakes
Eaves are the lower edges of a sloped roof, while rakes are the sloping edges along the sides of a gable roof.
Drip edge helps guide water away from these edges and can reduce the risk of moisture reaching exposed decking or fascia.
Correct placement and fastening are important. The edge components must work with the underlayment, shingles, and drainage system rather than create gaps or obstruct water flow.
Coordinating Edge Components With Gutters
For homes with gutters, the roof edge should be detailed so water flows appropriately into the gutter system.
Improperly installed edge components can contribute to water running behind gutters or reaching vulnerable fascia areas.
During asphalt shingle roof installation, the contractor should evaluate how the roof edge, drip edge, fascia, and gutters interact.
This is particularly important for homeowners who are also replacing or upgrading their gutters as part of an exterior renovation.
Install Roof Underlayment
Underlayment is installed over the roof deck and beneath the asphalt shingles. It provides an additional layer of protection against moisture that may pass beneath the primary roof covering.
Although shingles are designed to shed water, wind-driven rain, damaged shingles, and other conditions can allow moisture to reach areas underneath them.
Properly installed underlayment helps protect the roof deck as part of the complete roofing system.
Choosing the Appropriate Underlayment
Common underlayment options include asphalt-saturated felt, synthetic materials, and self-adhering products designed for particular applications.
The appropriate choice depends on the roof’s design, slope, weather exposure, manufacturer specifications, and local requirements.
Some products may be used across the main roof surface, while specialized self-adhering materials may be required or recommended in vulnerable areas.
Correct Overlaps and Fastening
Underlayment is installed in courses with overlaps that follow the product’s instructions. The material must be oriented and secured properly to help direct water toward the eaves.
Insufficient overlaps, loose sections, tears, and incorrect fastening can compromise its protective function.
Underlayment should also be inspected before the shingles cover it. Damaged sections need to be repaired or replaced according to the manufacturer’s instructions.
A carefully completed asphalt shingle roof installation includes proper underlayment rather than treating it as an unimportant layer hidden beneath the finished roof.
Install Ice Barriers and Additional Moisture Protection Where Required
Certain parts of a roof may require additional moisture protection, depending on the roof configuration and applicable building requirements.
Ice barriers are designed to reduce the risk of water intrusion associated with ice-related conditions. They are commonly installed along eaves and may be required in other vulnerable locations under applicable codes or roofing-system instructions.
The exact placement depends on the roof design, local requirements, and the materials being used.
Protecting Vulnerable Roof Areas
Roof valleys collect water from adjoining slopes, while areas around chimneys, skylights, and other penetrations require carefully coordinated flashing and underlayment details.
These areas should be planned before the final shingles are installed.
The contractor must follow the applicable requirements for the roofing system and ensure that water is directed away from openings and transitions.
Understanding the Limits of Ice Barriers
Ice barriers are not a replacement for proper attic insulation, ventilation, flashing, or roof drainage. Their role is to provide additional protection in designated areas.
Homeowners should ask the contractor which moisture-protection components are included and why they are appropriate for the property.
Install Starter Shingles
Starter shingles are installed along designated roof edges before the main field shingles. They help establish the initial shingle course and support protection around the roof perimeter.
Starter products are designed to work with the roofing system and may include adhesive strips that help secure the first course of shingles.
The exact product and placement depend on the shingle manufacturer’s instructions.
Why Starter Shingles Matter
The first shingle course is important because it establishes the alignment and coverage of the rows above it. Starter shingles also help address wind exposure near the roof edges.
Incorrect placement may leave gaps or interfere with the intended fastening and sealing pattern.
The starter course should be installed straight and securely, with the correct overhang and edge details.
Careful work at this stage helps establish the foundation for the remaining shingles.
Install the Main Asphalt Shingle Courses
Once the preparation layers and starter shingles are in place, the crew begins installing the main shingles.
This stage requires accurate alignment, consistent exposure, correct fastening, and careful attention to the manufacturer’s layout instructions.
Establishing the Shingle Pattern
Shingles are installed in overlapping courses that help direct water down the roof. The installer follows the product’s specified layout pattern and offsets joints as required.
Correct alignment helps maintain the roof’s appearance and reduces the risk of unintended gaps or improperly positioned joints.
The pattern may differ according to the shingle design and manufacturer.
Using the Correct Fasteners
Shingles must be secured using the fasteners and fastening locations specified for the product.
Fasteners placed too high, too low, or at an incorrect angle may reduce the shingles’ ability to remain secure. Overdriven fasteners can damage the shingle, while underdriven fasteners may prevent proper contact with the roof surface.
The required number of fasteners and their placement can vary by product and may be influenced by roof slope and wind requirements.
Maintaining Consistent Exposure
Exposure refers to the portion of each shingle visible after the next course is installed. Maintaining the specified exposure helps ensure that the roof has the intended coverage and appearance.
Inconsistent exposure can produce uneven lines and may affect how the shingle courses overlap.
The installer should follow the manufacturer’s measurements throughout the roof rather than relying on visual judgment alone.
Avoiding Installation Damage
Shingles can be damaged by improper handling, careless foot traffic, or unsuitable installation conditions.
Roofers should follow the manufacturer’s temperature and handling recommendations, particularly during cold weather or extreme heat.
A professional asphalt shingle roof installation requires attention to both the finished appearance and the technical details that support the roof’s performance.
Install Flashing Around Roof Penetrations and Transitions
Flashing is used to direct water away from vulnerable intersections and openings in the roof. It is commonly installed around chimneys, plumbing vents, skylights, walls, and other roof penetrations.
These areas require particular care because water can enter where roofing materials meet another surface or change direction.
Chimney and Wall Flashing
Chimneys and walls that intersect with a roof need appropriately designed flashing details. Depending on the configuration, this may include step flashing, counterflashing, or other components.
The flashing must integrate correctly with the roof covering and surrounding wall assembly.
Applying sealant alone is not an adequate substitute for properly designed flashing.
Plumbing Vent and Roof Penetrations
Plumbing vents and other roof penetrations require suitable flashing components that fit the opening and roofing material.
The shingles should be installed around these components according to the manufacturer’s instructions, ensuring that water is directed away from the penetration.
Damaged or incorrectly installed flashing can lead to leaks even when the surrounding shingles appear to be in good condition.
Roof Valleys
Valleys direct water from two adjoining roof slopes toward the lower roof edge. Their design and installation depend on the roofing system and manufacturer requirements.
The contractor must use the appropriate valley construction method and ensure that shingles, underlayment, and flashing components work together.
Correct detailing in these areas is an essential part of a reliable roofing system.
Install Ridge Caps and Complete the Roof Edges
Once the main shingle courses are installed, the contractor completes the ridges and hips using appropriate ridge-cap or hip-and-ridge products.
These components cover the intersections at the top and angled edges of the roof, helping protect them from weather exposure while creating a finished appearance.
Protecting Roof Ridges
Ridge caps must be installed with the appropriate overlap and fastening method. Their placement should account for the roof’s design and any ridge ventilation system.
If the roof uses a ridge vent, the roofing contractor must coordinate the vent installation with the ridge-cap shingles and the manufacturer’s specifications.
Improperly installed ridge components can create vulnerable areas that may allow water intrusion or become damaged in strong winds.
Completing the Roof Perimeter
The contractor should also inspect the eaves, rakes, valleys, and other edges to confirm that the roofing materials are properly aligned and secured.
Any required trim, flashing, or related components should be completed according to the roofing system’s requirements.
These finishing details contribute to the roof’s appearance and its ability to manage water.
Inspect Roof Ventilation and Related Components
Ventilation is another important consideration during a roofing project. A roof may use ridge vents, soffit vents, gable vents, or other ventilation arrangements, depending on the home’s design.
The appropriate ventilation strategy depends on the attic configuration, building requirements, and the existing system.
Why Attic Ventilation Matters
In a properly designed attic ventilation system, air movement can help manage heat and moisture under suitable conditions. This may help reduce certain moisture-related problems and support the performance of the roofing assembly.
However, ventilation must be coordinated with insulation, air sealing, and the home’s overall building design.
Adding a new roof does not automatically correct attic ventilation problems. The contractor should identify visible concerns and recommend appropriate assessment or improvements when needed.
Keeping Ventilation Openings Clear
During asphalt shingle roof installation, ventilation openings should not be blocked by insulation, roofing materials, or incorrectly installed components.
If ridge vents or other ventilation products are included, they must be installed according to their specifications.
Homeowners should discuss ventilation needs with the roofing contractor, especially if the attic has a history of condensation, excessive heat, or moisture problems.
Complete a Final Roofing Inspection
After the shingles and related components have been installed, the contractor should inspect the completed roofing system.
The inspection helps identify visible installation issues and confirms that important components have been completed according to the project scope.
Checking Shingles and Fasteners
The contractor should look for visibly damaged shingles, inconsistent alignment, improperly positioned components, and other concerns.
Fasteners should be installed according to the product requirements, and exposed or improperly placed fasteners should be addressed where necessary.
The roof’s ridges, hips, valleys, and edges should also receive attention.
Reviewing Flashing and Water-Management Details
Flashing around chimneys, vents, skylights, and wall intersections should be checked for proper integration with the roofing materials.
The contractor should also confirm that the roof edges and drainage details are completed appropriately.
A visual inspection cannot guarantee that a roof will never leak, but it can help identify visible defects before the project is considered complete.
Cleaning the Property
Roof replacement produces debris, packaging, and discarded roofing materials. The crew should remove project waste and clean the work area.
The contractor should also check accessible areas for loose debris and roofing materials left behind.
Homeowners should review the completed project with the contractor and receive relevant documentation, including product and workmanship warranty information when applicable.
Common Asphalt Shingle Roof Installation Mistakes
Recognizing common installation mistakes helps homeowners understand why workmanship is just as important as the materials selected.
Installing Shingles Over Damaged Decking
Damaged decking can prevent fasteners from holding properly and may conceal ongoing moisture problems. The underlying surface should be inspected and repaired before new roofing materials are installed.
Incorrect Shingle Fastening
Improper fastener placement can weaken shingle attachment and affect wind performance. Installers must follow the product’s fastening requirements and applicable local standards.
Poor Flashing Installation
Flashing errors are a common source of roof leaks. Areas around chimneys, skylights, walls, and vents require appropriate materials and installation techniques.
Inadequate Underlayment
Missing, torn, or incorrectly overlapped underlayment can leave parts of the roof deck vulnerable to water intrusion.
Ignoring Ventilation Problems
A roof replacement may leave existing attic moisture or ventilation concerns unresolved if these issues are not identified and addressed as part of the project.
Avoiding these problems requires careful preparation, suitable materials, and a contractor who follows manufacturer instructions and applicable building requirements.
How Long Does Asphalt Shingle Roof Installation Take?
The length of a roofing project depends on the roof’s size, slope, complexity, weather conditions, material availability, and the amount of repair work required.
A relatively straightforward residential roof replacement may be completed in a day or several days, while larger or more complex projects can take longer.
Unexpected decking damage, difficult access, additional flashing work, or weather delays can also affect the schedule.
Homeowners should ask for an estimated timeline and clarify how the contractor will communicate changes. Weather is particularly important because rain, high winds, and unsuitable temperatures may affect safe installation and material performance.
A reliable contractor should prioritize appropriate installation conditions rather than rushing work to meet an unrealistic deadline.
Choosing Painter Roofing for Asphalt Shingle Roof Installation in Arlington, VA
Selecting the right roofing contractor is an important part of protecting your home and making the most of your investment.
Homeowners should look for a contractor who explains the proposed materials, identifies the major stages of the project, and provides a clear written scope of work. The proposal should address roof preparation, decking repairs, underlayment, flashing, shingles, cleanup, and relevant warranty information.
It is also helpful to understand how the contractor will handle unexpected damage discovered during the tear-off process.
Painter Roofing serves homeowners in Arlington, VA, and surrounding Northern Virginia communities with roofing and exterior improvement services. When planning asphalt shingle roof installation, homeowners can benefit from discussing their roof’s condition, preferred shingle styles, moisture-management needs, and long-term maintenance goals.
The right roofing solution should reflect the home’s design and requirements rather than relying on a one-size-fits-all approach.
Homeowners should also review warranty terms carefully, confirm the products included in the estimate, and understand what is covered by the contractor’s workmanship warranty, if provided.
Maintaining Your Asphalt Shingle Roof After Installation
Once the new roof is installed, regular maintenance can help homeowners identify developing issues and preserve the roofing system.
Schedule Periodic Inspections
Roof inspections can identify missing shingles, damaged flashing, exposed fasteners, deteriorating sealant, and other visible concerns.
Inspections are particularly useful after significant storms or when the roof has experienced impact damage.
Homeowners should avoid climbing onto the roof themselves. A qualified professional can assess roof conditions more safely and identify problems that may be difficult to see from the ground.
Keep Gutters and Downspouts Clear
Clogged gutters can interfere with water drainage and contribute to overflow near roof edges. Keeping gutters and downspouts clear helps direct rainwater away from the home.
During maintenance, check for sagging sections, loose connections, and visible damage that could affect drainage.
Monitor the Attic and Ceilings
Water stains, damp insulation, musty odors, or visible moisture in the attic can indicate a roofing or ventilation problem.
These signs should be evaluated promptly, even if the exterior shingles appear intact. Water can travel along framing and appear far from its original entry point.
Address Repairs Promptly
Missing shingles, damaged flashing, and other roofing defects should be assessed before they lead to more extensive damage.
Timely repairs can help preserve the roof’s performance and may reduce the need for more extensive work later.
Conclusion
A successful asphalt shingle roof installation involves a series of carefully coordinated steps, from inspecting the existing roof and preparing the deck to installing underlayment, shingles, flashing, and ridge caps. Each component contributes to the completed roofing system, and mistakes at any stage can affect the roof’s durability and ability to manage water.
For homeowners in Arlington, VA, and the surrounding areas, choosing suitable shingles and ensuring proper installation are essential to protecting the home. The local climate makes careful moisture management, correct flashing, and appropriate roof detailing particularly important.
A well-planned roofing project is more than a cosmetic improvement. It is an opportunity to address underlying issues, install compatible materials, and establish a reliable roofing system that helps protect the home for years to come.