Rainwater is harmless—until it starts damaging your home. That’s where gutters come in. Gutters guide water away from your foundation, siding, and roof, keeping everything dry and protected. But having gutters is only part of the equation. What really matters is the gutter installation process.
At Painter Roofing, we often hear from Arlington homeowners who are unsure about what goes into installing new gutters or upgrading their old system. That’s why we’ve created this complete guide. From planning and materials to placement and final inspection, this article will walk you through each step of the gutter setup process.
Whether you’re replacing worn-out gutters or starting fresh on a new build, understanding the full process helps ensure you make the right decisions for your property—and get lasting results.
Why Proper Gutter Installation Matters
A poorly installed gutter system can cause significant damage to your home. Water that isn’t directed properly may lead to foundation cracks, mold growth, soil erosion, or roof rot. That’s why a precise, professional gutter installation is essential.
Proper installation helps prevent water pooling near the foundation, protects soffits, fascia, and siding, reduces basement moisture and leaks, extends the roof’s lifespan, and prevents erosion around landscaping. For Arlington homeowners, neglecting gutters often results in costly repairs that far exceed the original installation investment.
Initial Assessment and Planning
Every successful gutter installation process begins with a full inspection of the home’s roofline, fascia boards, downspout outlets, and water drainage patterns. At this stage, a technician will measure the roof length and slope, evaluate the home’s architecture and elevation, check existing water flow patterns or trouble spots, discuss any issues you’ve noticed, like overflowing or clogging, and identify areas that need extra protection, such as roof valleys or corners. In Arlington, where both seasonal storms and dense tree coverage can affect water flow, careful planning is key to ensuring long-term gutter performance.
Selecting the Right Materials
The next step in the gutter installation process is choosing your materials. Painter Roofing helps you select the best fit for your budget, style, and durability needs. Common gutter materials include aluminum, which is lightweight, rust-resistant, and popular for residential use; copper, which offers a premium look and is highly durable, developing a patina over time; vinyl, which is affordable and rustproof but less durable in extreme weather; and galvanized steel, which is strong but prone to rust if not properly maintained. You’ll also choose the style (K-style, half-round, or box-style) and color that match your home’s exterior. Material choice isn’t just cosmetic—it affects the entire gutter setup process, including attachment methods, slope angles, and lifespan.
Measuring and Cutting
Precision is everything in the gutter installation process. Gutters that are too short or poorly sloped will not drain correctly. In this stage, the exact lengths of gutter sections are measured for each roofline segment. Angled cuts are made for corners and joins, and miters are prepped to allow for smooth transitions. Downspout holes are cut in appropriate spots for optimal drainage. This part of the job is often done on-site using portable cutting tools to ensure a perfect fitment for your Arlington property.
Before attaching anything, the fascia boards (the area behind the gutter) must be inspected and prepared. Rotten or soft wood must be replaced, as secure mounting is essential to withstand heavy rain. Your roofer will replace damaged fascia if needed, ensure a straight, level surface for attachment, confirm proper drip edge placement under shingles, and apply sealants to potential water entry points. Skipping this step can lead to sagging gutters or water seeping behind the system, creating long-term issues for Arlington homes.
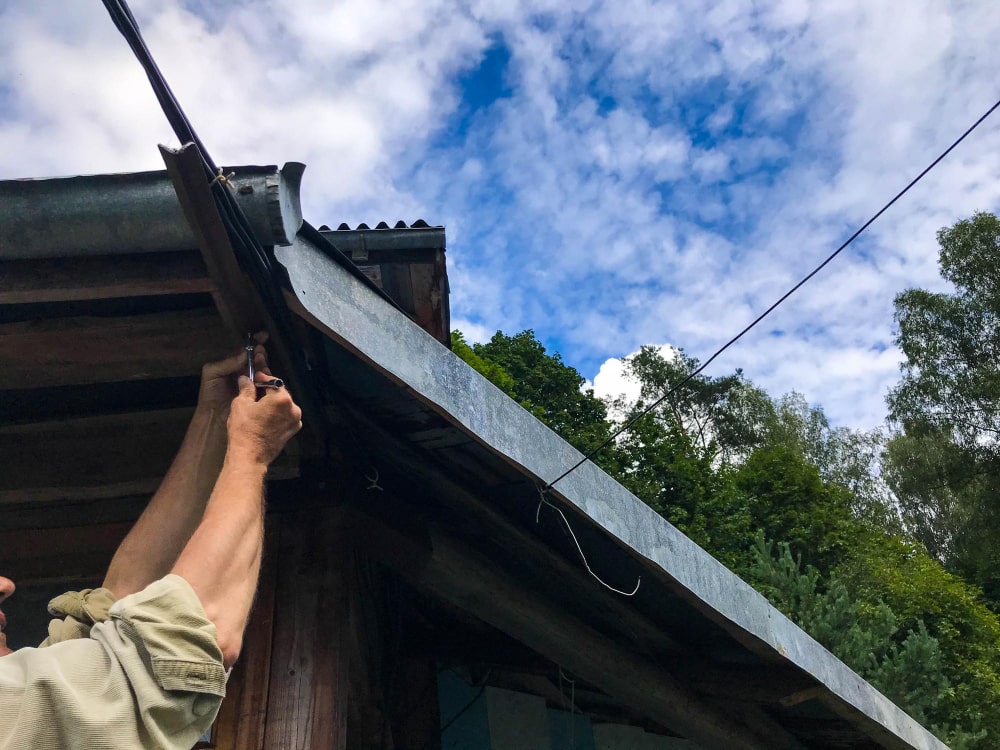
Hanging the Gutters
Now comes the core step in the gutter setup process—mounting the gutters themselves. This is done using hangers or brackets spaced evenly (typically every 2–3 feet), a subtle slope of about 1/4 inch for every 10 feet toward the downspout, and secure end caps, seam joints, and sealants to prevent leaks. The gutters must look straight from ground level but be angled just enough to keep water moving. When installed correctly, the system blends in seamlessly while providing top-notch performance.
Downspout Placement and Attachment
Downspouts carry water from the gutters to the ground—and away from your home. Their placement is crucial to proper drainage. Best practices for downspouts during the gutter setup process include placing one every 30–40 feet of gutter, directing water at least 5 feet away from your foundation, avoiding areas where water could pool or erode landscaping, and using extensions or splash blocks to control flow. In Arlington neighborhoods, where sloped lawns and driveways vary, custom downspout placement ensures safe drainage for your specific property.
Testing and Final Inspection
No gutter setup process is complete without thorough testing. This ensures everything is functioning correctly and ready to handle rain. The crew will pour water into the highest gutter point and watch the flow, check for any leaks, sagging, or pooling, ensure downspouts are directing water properly, and tighten all brackets while sealing any final gaps. A final walk-through gives you peace of mind that the system will work when you need it most—especially during Arlington’s rainy season.
Optional Add-Ons: Guards, Screens, and Leaf Filters
If your home is surrounded by trees, like many Arlington properties, adding gutter protection is a smart move. While not required, they can significantly reduce maintenance needs. Add-ons during the gutter installation process may include gutter guards, which are mesh or solid covers that block debris; leaf filters, which are fine screens that prevent clogs but let water through; and downspout filters, which stop leaves before they enter underground drains. Discussing these with your installer ensures everything fits your system and doesn’t interfere with drainage.
Maintenance Tips After Installation
Even the best gutter system needs some care. Once your steps to install gutters is complete, follow these maintenance tips to keep your system functioning properly. Clean out gutters twice a year, or more often if you have overhanging trees, and rinse downspouts to ensure clear flow. In winter, watch for icicle buildup, and re-caulk any leaking seams to prevent water from seeping through. If you notice sagging or detachment, call for repairs promptly. Staying proactive with maintenance extends the life of your gutters and prevents water-related issues from escalating.
Common Mistakes to Avoid
Some contractors rush the gutter installation process, leading to poor results. Common mistakes to avoid include improper slope, which causes water to fail to drain and leads to overflows; too few downspouts, which can cause pooling and erosion; incorrect fastener spacing, which results in sagging gutters; ignoring fascia damage, which leads to weak mounting and future failure; and skipping the final water test, which may leave unseen problems undetected. Painter Roofing ensures that none of these shortcuts happen on your job. Our experienced team follows a detailed process tailored to each home.
Costs of Gutter Installation in Arlington, VA
The cost of gutter installation can vary depending on the size of your home, material choice, and the complexity of the project. On average, aluminum gutters cost between $6 and $12 per linear foot, while copper gutters range from $20 to $30 per linear foot. Gutter guards can cost between $4 and $10 per linear foot. A complete steps to install gutters for a mid-size home typically ranges from $1,000 to $2,500. However, investing in quality work now prevents costly water damage later.
Why Choose Painter Roofing for Your Gutter Installation
At Painter Roofing, we’ve helped hundreds of Arlington homeowners protect their homes through precise, professional gutter installations. When you work with us, you get local knowledge of weather and building codes, custom-fit solutions for your home’s design, transparent quotes and honest recommendations, a fully insured, licensed, and experienced crew, and long-term warranties with satisfaction guarantees. We’re not just installing gutters—we’re protecting your home, your investment, and your peace of mind.
Conclusion
The gutter fitting procedure may seem straightforward, but doing it right requires experience, precision, and attention to detail. From selecting the right materials to placing downspouts and testing flow, each step matters for the system’s long-term success.
For Arlington homeowners, Painter Roofing offers a seamless experience from start to finish. Whether you’re upgrading old gutters or outfitting a brand-new home, we’re here to make sure your drainage system performs reliably in every season. Ensure Proper Water Drainage – Schedule Your Gutter Installation with Painter Roofing.
FAQs
How do you install guttering step by step?
The gutter fitting procedure includes assessing the roofline, choosing the right materials, measuring and cutting gutters to fit, mounting gutters using hangers and brackets, installing downspouts, and performing a final water test to ensure proper drainage.
How much does it cost to put gutters on a 1,500 sq ft house?
Gutter installation costs for a 1,500 sq ft house typically range from $1,000 to $2,500, depending on the material choice, the complexity of the installation, and any additional features like gutter guards.
What is needed to install gutters?
To install gutters, you’ll need materials such as gutters (aluminum, copper, or galvanized steel), downspouts, hangers, brackets, nails or screws, sealants, and tools for measuring, cutting, and securing the gutters.
What is the rule of thumb for gutters?
A common rule of thumb for gutter installation is to ensure a slight slope of about 1/4 inch for every 10 feet of gutter length to allow water to flow properly toward the downspouts and away from your foundation.
What is the best time of year to install gutters?
The best time to install gutters is during the fall or spring when the weather is mild. This allows for easier installation, better material performance, and avoids extreme weather conditions that could delay or damage the system.